GPF Docs
Hello World Tutorial: part 3 - Hooking Up UI
Hello World Tutorial: part 3 - Hooking Up UI
Now that our SO works, the next step is to hook it up to UI.
Adding a controller
1.Create and save a new Scene from the Project window under Assets\Scenes called HelloWorld
2.Select that scene from the Hierarchy window, add an empty GameObject, call it Controller, and add a new script component to it called HelloWorldController. This is where we will refer to Syncer (the object that let's us access ServerObjects). This script will also contain our button callback code.
3.Open the newly created script and replace the using block with these lines:
using GPF;using UnityEngine;using HelloWorld.SOs;using GPF.ServerObjects;4.Add these statements to the classes variable declarations.
private Syncer syncer;private HelloSO helloSO;5.Add this code to the Start function:
syncer = Syncer.CreateSyncer();// get an ID, for learning puposes use a hard coded value "hello_object_id"var helloSOID = Registry.GetId<HelloSO>("hello_object_id");// get reference to helloSOhelloSO = await syncer.Sync(helloSOID);6.Since we plan on creating a button that will send World to Syncer, add the callback code for that button. We can copy and paste the guts from our unit test into a SendName function in HelloWorldController:
public void SendName() { //get an ID var helloSOID = Registry.GetId<HelloSO>(); // get reference to helloSO HelloSO helloSO = await syncer.Sync(helloSOID); // Let's tell the SO our name so it can say hello to us. // Note await syncer.SendUpdateWait doesn't return until the SO is updated. await syncer.SendWait(helloSO, new HelloSO.MyNameIs { name = "World" }); // Now let's check to see things went as planned. Assert.That(helloSO.greeting, Is.EqualTo("Hello World") ); }The problem with this code is every time we click the button, we will be sending our name to a different instance of HelloSO, because Registry.GetId() returns a random ID when we don't pass it a suffix string.
7.What we need to do instead is make the ID of the HelloSO we are communicating with a class variable. We also need to create a Datastore link to that SO so our UI can reflect it's state. Replace the code in HelloWorldController with the following code (that incorporates these refactors).
using GPF;using UnityEngine;using HelloWorld.SOs;using GPF.ServerObjects;public class HelloWorldController : MonoBehaviour{ private Syncer syncer; private HelloSO helloSO; // Start is called before the first frame update async void Start() { syncer = Syncer.CreateSyncer(); // get an ID, for learning puposes use a hard coded value "hello_object_id" var helloSOID = Registry.GetId<HelloSO>("hello_object_id"); // get reference to helloSO helloSO = await syncer.Sync(helloSOID); } public void SendName() { // Let's tell the SO our name so it can say hello to us. syncer.Send(helloSO, new HelloSO.MyNameIs { name = "World" }); }}Notice that, inside of SendName, we are now using Syncer.Send instead of await Syncer.SendWait. The difference being, in the test we needed to know the message had been sent and processed before we could evaluate the Assert on the next line, however in this case we can just fire and forgot.
8.The main instance of DataStore is a global place for data to go to. Putting data here not only makes it accessible anywhere in your application, it allows our ViewBindings to bind to those values. Syncer will automatically sync every SO's field values into the DataStore.
Go back to HelloSO inside of ServerObjects and add this attribute to the top of the class
[DataStorePath("sync.hello")]This will tell Syncer where to put the SO's values within the datastore, and subsequently let us bind it's fields to UI.
View game state with DataStore Explorer
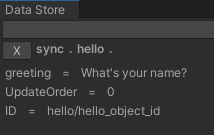
DataStore Explorer is a really powerful tool that can confirm whether or not our state is setup correctly when we are debugging issues. Before adding UI, we can play the scene and use the DataStore Explorer to look at the state of the app by clicking on GPF -> DataStore Explorer. Then click on sync.hello within the datastore explorer and observe the initial state of the helloSO.
Adding UI to the Scene
Within the Hierarchy window, select the HelloWorld Scene and click GameObject -> UI-> Canvas to add a Canvas, name it "Canvas"
2.Within the Hierarchy window, select the Canvas click GameObject -> UI-> Text and name it greeting_txt. Set the Text field to "Hello Default" to help us confirm our VeiwBinding properly takes control of greeting_txt.
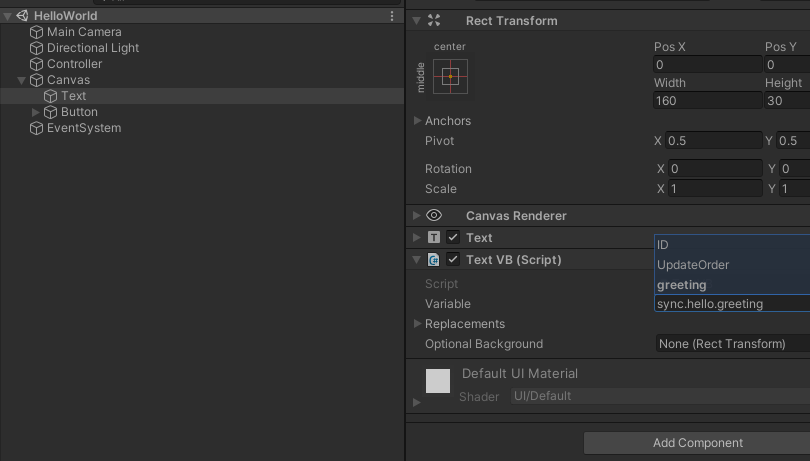
3.Attach Text VB Component to greeting_txt. This is a ViewBinding that comes with GPF that allows us to sync SO state to UI.
4.Set variable to sync.hello.greeting (this refers to the datastore attribute we put on HelloSO).
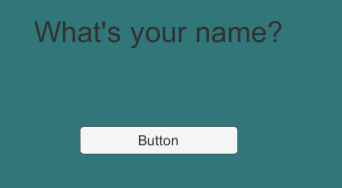
5.Play the scene, you should see the text "What's your name?" in the Editor window because this is the default text in the SO.
6.Add a button to the scene under Canvas and hook it up to the SendName function within HelloController.
7.Play it again, and you should see the "What's your name?" text switch to "Hello World" when the button is pressed. You can also open the DataStore Explorer and observe the same change there.
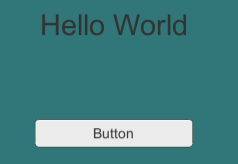
Congratulations! You are syncing data from a remote computer all the way into your UI.
© 2023 Launch It Labs INC