GPF Docs
Guide to Hooking Up UI
Guide to Hooking Up UI
GPF allows you to hook SO fields up to UI directly, through an autocomplete interface within the Inspector panel. For a step by step walkthrough of how to hook up UI check out the UI portion of our Hello World Tutorial.
[DataStorePath]
You need to use the [DataStorePath] and [Syncable] attributes on SOs that have fields that you want to bind to UI. For example:
[DataStorePath("sync.coin_players")][Syncable][Register("coin_player")]public class CoinPlayerSO : ServerObject{...}The [DataStorePath] attribute will make an SO's state is available to the UI through the DataStore.
We can sync to a PlayerSO with the following line:
The [Syncable] attribute allows the client to access the latest SO using Syncer.Sync.
var playerID = Registry.GetId<CoinPlayerSO>();player = await syncer.Sync(playerID);The UI will now be able to directly show the state within the CoinPlayerSO under the variable path "sync.players.playerID.<field_name>"
Every user's playerID will be different, so to give the UI a consistent path we can use an alias within the Syncer using the Alias() function:
syncer.Alias(player, "player");This gives us the ability to reference the player object using "player" in UI elements with the variable "player.<field_name>".
With the SO and DataStore setup, we can add a ViewBinding to a GameObject in our scene.
First, create Unity Canvas Text object with GameObject->UI->Text.

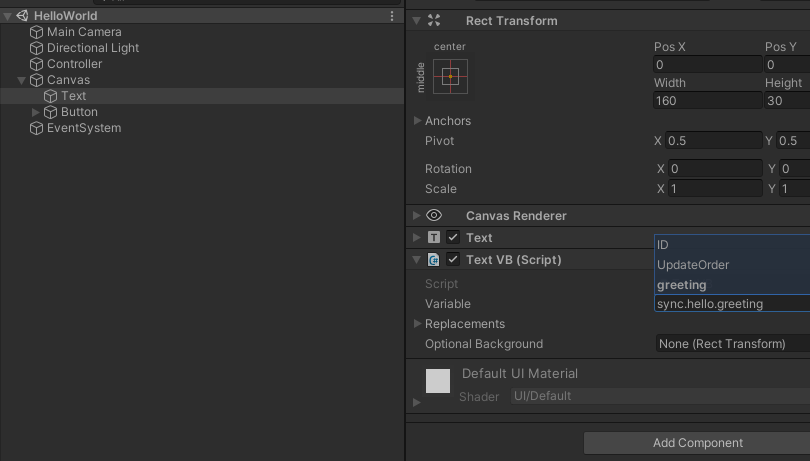
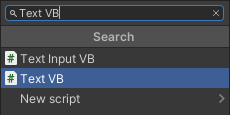
Add a Text VB component to the object.
Select the Variable field of the Text VB component and you will see the auto complete menu open.
Type in, or select "player.currentStreak"
The Text component will now display the value in "player.currentStreak".
ViewBindings are extremely powerful tools to create glitch-free reusable UI elements. The next section breaks down each GPF provided ViewBinding and explains how to use it.
© 2023 Launch It Labs INC